Pages

Showing posts with label DIY. Show all posts

Thursday, October 8, 2015

10 Uses for Vinegar


Ten Great Ways to Clean With Vinegar
  1. Remove crayon marks from clothes with a few dabs of vinegar.
  2. Remove stickers and price tags by dabbing a little vinegar on the sticker.
  3. Disinfect cutting boards by wiping it down with vinegar after every use.
  4. Wash away mildew from your shower curtain by spraying vinegar on it after you bathe.. 
  5. Remove stains from pots and pans by mixing 1 cup vinegar 2 tbs baking soda 1 cup water.
  6. Peel off wallpaper by mixing equal parts of water and vinegar and spraying directly onto the wallpaper.
  7. Clean and disinfect baby toys. Then rinse them well so babies don't taste it when they put them in their mouths.
  8. Fabric softener by adding about 1/4 cup of vinegar to your laundry load to soften your fabric.
  9. Gum remover — spray vinegar on the area where the gum is stuck & the gum will dissolve.
  10. Get shinier, streak-free glasses by adding a cup of vinegar to your dishwasher with each load.

Wednesday, October 7, 2015

12 Uses for Clear Nail Polish


12 Uses for clear nail polish, besides using it on your nails! Great DIY life hacks!
Check out Joni's website: www.jonihilton.com
Visit her Facebook: http://on.fb.me/1bXAsXd

Sunday, November 17, 2013

How to Open a Stuck Jar Lid- from Your YouTube Mom


Get more helpful and great tips from Joni Hilton, "Your YouTube Mom," on her YouTube channel- http://www.youtube.com/user/jonimhilton

Tuesday, November 12, 2013

Christmas Craft


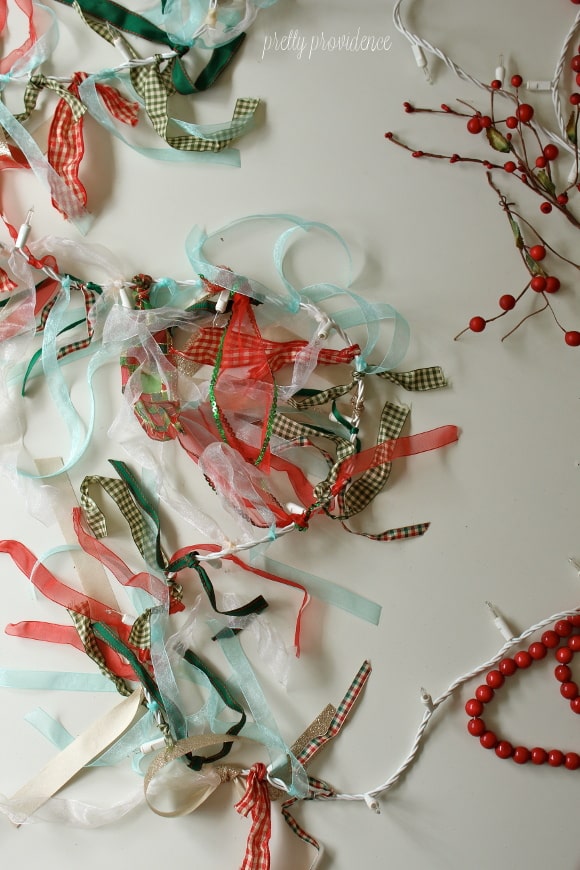
The problem: Too many different styles of Christmas decor. The answer: re-purposing and revamping it so it all fits my style & donating what I know I won’t use. Enter: the DIY Christmas garland from scraps of ribbon.

Check out the solution over at a Frugal Lifestyle Blog


Pin It

Tuesday, December 27, 2011

Best Homemade Stuffing (and it is cheap!)

Best homemade stuffing ever!

I've always been a Stovetop stuffing kind of girl. It was all I knew. It is cheap, easy, and really, I kind of like the way it tastes. But I had heard rumors that there are far better stuffings out there and that I hadn't lived until I had expanded my stuffing and dressing horizons.
Armed with nothing more than this information, I went to Pinterest and then Google to find a good homemade stuffing recipe. I could link you to the one I attempted to go with. But really by the time I had perfected it the way I liked it, it was only a distant cousin to the original.
Speaking of distant cousins, I made this stuffing to go along with the turkey I also made, and shared at a dinner with 17 of my own distant and not-so-distant cousins. It was a huge hit, and 2 days later I'm still getting comments on it!
Without further ado, my all-new, personalized, delicious, homemade, inexpensive, and super easy to make, Christmas stuffing.

1 loaf wheat bread (I bought mine for $0.49 in the "day old" section of my grocery store.)
1 loaf white bread (see above, same thing)
1 bag fresh cranberries
3 red delicious apples
3-5 celery stalks (depending on how much you like crunch in your stuffing. Much to my own surprise, I loved it.)
a few green onions (depending on how much you like onion. I don't care for it, and only put in 3.)
4 cups of apple juice
2-4 cups of turkey drippings (I really didn't measure how much I put in, I just kept ladling it in throughout the day, and stirring it up. This is again completely to taste, depending on how moist you like your stuffing. Again, I had only had Stovetop prior to this, and like my stuffing VERY moist, practically soupy.)
1-2 tbsp of butter or margarine
1-2 cloves of garlic (depending on how much you like garlic. I'm a little to medium garlic fan, and only put in 1 clove. It was barely discernible in the final product. If you like garlic, you'll want more than one clove.)
2-3 tbsp Fresh parsley
1-2 sprigs Fresh thyme
1 sprig Fresh rosemary (optional)


Preheat oven to 350 degrees.
Dice/cube your apples. (I didn't peel mine.)
Chop up celery and onions.
Toast all bread till it is nice and crunchy. (I toasted mine the night before. I live in a humid climate where it is hard to get bread dry enough. So I toasted it and let it sit out exposed overnight to dry it out enough.)
Put apples and cranberries in a bowl and pour all the apple juice over it. Let it sit while you are doing the rest of the steps.  Make sure this is a big bowl that you can combine all the ingredients into later.
Cube and cut up the bread. (I did this by hand and didn't bother trying to cut it. Worked fine for me.)
Saute the butter, onion, celery, garlic, parsley, thyme, and rosemary just 2-3 minutes. Just enough to break out the flavors.
Mix sauteed ingredients into the bread.
Combine the bread with the apples, cranberries, and juice.
Stir together well.
If you have hot turkey drippings you can add, do it as you stir and combine all of the ingredients.  But don't use up all of the drippings yet.
I put all of my ingredients together into a heavy saucepan that I could stick into the oven. You could also use a casserole dish for this.
Don't worry about making it as moist as you would like it to be quite yet. You can keep adding in hot turkey drippings later.
Put in the oven and bake at 350 degrees for 15-20 minutes.
I still had several hours before we would be eating after I made it (and then had to take it to someone else's house). It held up perfectly. Keeping it in the saucepan I baked it in, and putting a lid over it, I put it on the stove at their home, over low heat, and stirred it periodically, and kept adding drippings.
I should also add that I had a saltwater brined turkey (really the only way to brine a turkey! It is delicious!), so my drippings added a great deal of flavor to the recipe.
It was absolutely beautiful in the pan! And tasted delicious! The bread was nice and moist, and the celery and cranberries added a nice crunch and tang to it.

This served 18 adults and we didn't have one crumb of leftovers. But we did have more than a few servings each!
I liked it so much that I'm going to make some more just for me later this week tonight!


Pin It

Thursday, December 15, 2011

DIY Homemade and Affordable Dishwasher Detergent

DIY homemade dishwasher detergent
DIY Homemade Dishwasher Detergent Ingredients

In my never ending quest to find more affordable and greener alternatives to brand name products I recently started searching out better dishwasher detergents. Using Pinterest and Google I looked up several different homemade options for dishwasher detergents. The majority of them were very similar in ingredients and combinations. So I tested out a few options and here is what I came up with!

First, let's make sure you have optimal dishwasher conditions. Clean up your sink, run some water down the garbage disposal, and then put in 1 cup of bleach. Let the bleach sit for a few minutes before running hot water and the garbage disposal. This will get the muck out of your system, and help your dishwasher run better.

Second, do the same with your dishwasher. Empty the dishwasher, pour 1 cup of bleach in the bottom of your dishwasher, and run a short, hot cycle. This kills any lingering bacteria in your dishwasher, and cleans out the muck in the pipes. I frequently toss my sponges in the dishwasher (top rack) when I do this.

Now, knowing your system is at its best, here's the cheapest, and incredibly effective homemade, dishwasher detergent! 

DIY Dishwasher Detergent Ingredients-
1 box Borax (4lbs 12 oz or 76 oz ) (I found it by the laundry detergent) $5.15
1 box Arm and Hammer Baking Soda (2 lbs box) $3.59

White Vinegar $1.19

Mix the Borax and baking soda in a bowl, and store in a dry container. And that's it! Ta da! No fancy anything to it! All you need is 1 tablespoon of the dry mixture! Put it in the detergent dispenser of your dishwasher.
The vinegar is in lieu of other rinse aids. Fill up your rinse aid dispenser with the vinegar.

The ingredients at full cost only come to $9.93. But because I'm always looking for ways to make things even more affordable, I went to ArmandHammer.com and got some coupons! I got a full dollar off the baking soda, and when I got to the store it was on-sale $0.75 off! Woo-hoo! Bargain!

This detergent 'recipe' makes about a 6 month supply! Math- 76 oz + 64 oz = 140 oz. 1 tablespoon = .5 ounces. Which comes to 280 "servings." If you do 1 load a day, that's 280 days, which is closer to 9 months. But you may want to use just a touch more for heavy loads, and sometimes you may do 2 loads a day. So we'll compromise and say it is a 7.5 month supply of dish detergent for under $10 (or $8 if you use the coupon)!

It's cheap, but DOES IT WORK?!
Before-
One dirty, older glass, before it went in.

And the after! I see no need for another rinse agent.

Other versions included adding citric acid, kosher salt, or epsom salts. One even said to add lemon rinse. None of these products add to the effectiveness of cleaning, so I don't see the point in using them. (I really don't get the point of the salt!) If you have hard water you may want to add the lemon rinse (which was not cheap) to get shinier glass. I have really hard water, but this method worked just fine for me!

Pin It

Wednesday, October 26, 2011

Do It Yourself Composting Toilet


I'm not sure if I'd ever actually try this myself, but it is interesting to see that there are people out there making it happen. Its not hard to do, and serves a great purpose. 
Related Posts Plugin for WordPress, Blogger...